Thursday, September 30, 2010

How To: Matting a Photo

I know that some of you are expert scrappers and already know how to mat a photo. BUT...not everyone that reads this blog is an expert and that's why I'm doing this how-to today!
There are a ton of ways to technically mat a photo and this is just how I happen to do it. This way works no matter what size your photo is and you will come out with a perfect mat every time.
Matting your photos will really change the way your layouts look! It will make them look more professional and it will really make your photos pop!
I'm going to show you how and then I will show you some matting options!

Supply List:

- Paper Trimmer
(I have used the Cutterpede paper trimmer for the last 5 years. The parts are replaceable and inexpensive and I just love how it measures and cuts. It also has decorative blades you can buy. I use these for a lot of my trim work.)

- Photos

- Cardstock or Patterned Paper


STEP 1:
Take the photo you want to mat and measure both sides. Write it down if you are forgetful like me! ;)
We are going to trim the cardstock 1/4 of an inch larger than the size of the photo.
For this How To we are going to use a 4x6 photo.


STEP 2:
Trim your cardstock to 1/4 of an inch wider than your photo width.
For 4x6 photos and this How To we will trim the width to 4 1/4.


STEP 3:
Now trim the other end of your cardstock to 1/4 of an inch wider than your photo length.
For 4x6 photos and this How To we will trim the length to 6 1/4.


STEP 4:
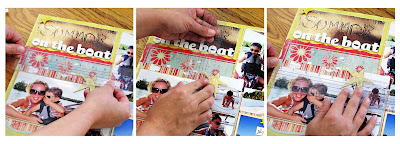
Adhere your photo to the center of your cardstock mat! That's it!
Above you can see how the 1/4 of an inch mat looks.


This is how the 1/2 of an inch mat looks. If you want a wider border just cut your mat to 1/2 an inch wider than your photo!
That's it! Super easy! There are so many different ways to use this!


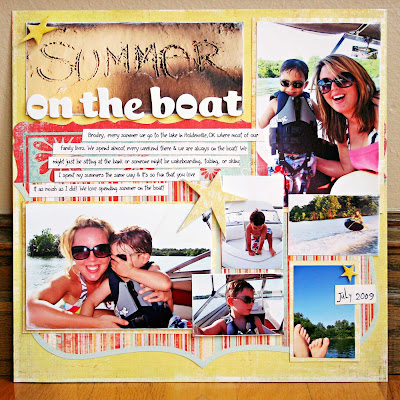
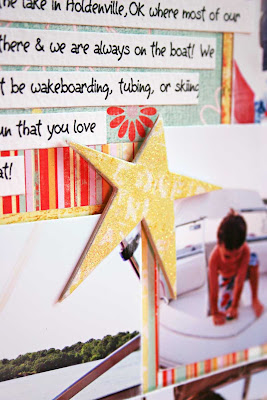
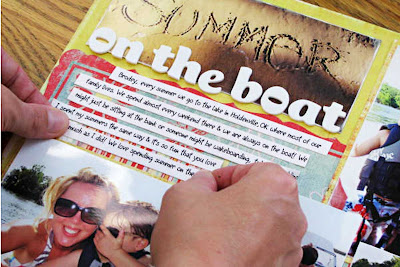
For this layout I simply matted all of the photos with orange paper. Since there are so many photos on this small page it keeps them separate, but makes them stand out.


For this layout about Brodey's birthday I only matted the main photo. I did this by trimming one side of my blue patterned paper 1/2 of an inch larger and leaving the other side the length of my page. I even matted that piece of patterned paper with a striped piece!
A shortcut to matting a photo is to simply sand the edges of the photo. I did this in this layout. If you don't have sandpaper you can also use white acrylic paint and your finger or a paintbrush to lightly paint the edges of the photo. I like to use the white acrylic Paint Dabber by Ranger. It has a foam applicator similar to a Bingo dabber. It's super quick and easy!


I did this layout a couple of years ago about my sister. Not only did I sand the edges of the photos (like I talked about above), but I also matted my photos with patterned paper. I love doing this because I love patterned paper and I will jump at any opportunity to use it! You can even mat and stack different sizes of patterned papers mats!

This is a super easy way to make your photos really pop! If you haven't tried this I hope I have given you the courage to!
If you have any questions feel free to comment or send me an email!
If you have any suggestions for future How To's let me know!
Have a wonderful Thursday!

LUV APRIL :)

Wednesday, September 29, 2010

Student of the Month


**WARNING: bragging straight ahead!**
Like most kids Brodey is excellent at school and a terror at home. I say terror, but he really isn't that bad. He has his moments of not listening and doing things just to get a reaction. At school he is an entirely different kid.
Every time Mrs Tuck or Mrs Delmetico(her part time assistant) tell me how "absolutely perfect" he is I have to say "well I'm glad he saves all the bad for when he gets home!"
This afternoon I got a text from Mrs Tuck that said "Our students of the month for October is...Brodey and Tessa! Woohoo!!!"
I was like wow but I wasn't sure if it was just random or actually earned. So I was like "Oh my gosh really!?! That's awesome! What did he do to deserve that?"
She said "He's just a great kid who listens and tries really hard for his teacher! I feel very fortunate to have him in my class. :) "
AW! It brought tears to my eyes! As a mom I can't help but worry about how he acts when he isn't with me. I also can't help but feel like a lot of how well he acts is due to Mrs Tuck and Mrs Delmetico. They are super awesome and I feel lucky to have them with Brodey during the day!
He is now playing in the living room singing "Student of the Month is cool. Student of the Month is cool." Hahaha!
He says he will "get Student of the Month" tomorrow so I guess we will have to see! I'll try to take some pics!
Well that's all to report today!
I must go finish laundry and start dinner! Hamburger steak for dinner with peppers, mushrooms, and onions! Yum! I told ya we eat healthy 'round here!
Goodnight and happy humpday!
LUV APRIL :)

Tuesday, September 28, 2010

Blank


I sat down to write tonight and my mind went blank. I had some funny stuff to write about and it's gone now. I guess I need to start sending myself text messages. Sheesh! Sorry for the lame post!
Maybe I can do better tomorrow!
At least I posted a pic this time! Me and the Bro man with his new tie t-shirt on. Ain't he cute? ;)

Hope your Tuesday has been terrific! I couldn't resist!
Goodnight!
LUV APRIL

Monday, September 27, 2010

Oh Deer It's Monday

It's Monday. Life gets back to normal.
I had a great weekend! Ate some good food. Finally got to see Easy A with my sister. Hit a deer. Well the hitting the deer part wasn't so great, but other than that it was a good weekend!
Here in Oklahoma I think everyone has hit at least one deer. This was a first for me. They are everywhere this time of year. I didn't actually hit it. Eric did so I can blame it on him. I'll spare you the details, but Eric had to be merciful. You can see very little damage to my SUV, but you can't open the passenger door. Yes it's fun getting in and out Dukes of Hazard style. ;)
This was the first day to dress Bro in pants and a long sleeved t-shirt. He was a little weirded out at first but then he thought it was cool. "I think I like this long shirt, Mom."
Sweet Mrs Tuck did Brodey's parent/teacher conference after school today so I wouldn't have to go back tonight. He is doing great! He can write his name, recognize several alphabets, and all that jazz. She said he is a rhyming superstar and that sometimes means they will have an easier time learning to read. That would be nice. I couldn't wait to read. Mine had to to with Independence, though, and not having to ask anyone anymore. I wanted to do it myself! Now I can't read enough. I'll read a label just to have something to read!
We still have a few hummingbirds! My hibiscus plants are all blooming like crazy and I know they have to be big red beacons to them flying passed in the sky.
Not too much going on besides that. I have been working on layouts all day again so I've been keeping myself busy!
I'm off to cook dinner tonight. The boys are excited for chicken fried pork chops. We are super healthy 'round here. ;)
Have a wonderful Monday night!
LUV APRIL

Saturday, September 25, 2010

Movie Popcron Without the Movie

Have you ever eaten your movie popcorn outside of the movies? I have! I have! But I'll get to that in a bit.

Friday was a GREAT day! My bestie Destiny (that sounds funny) came and stayed Thursday night and then we went to the mall in Tulsa on Friday! We got some shopping done (jeans at the Gap are 50% off by the way)and just had an awesome time hanging out!
After the mall we met Eric and Brodey for some sushi. It was SO good!
Brodey had been asking to go see The Guardians (that owl movie) so we were going to take him after dinner. Eric had to return some shoes at the mall so he dropped Brodey and I off and he headed there.
After Bro and I stood in line for our $23 tickets, stood in line for our popcorn and cherry Icee, we headed back to the movie. As we were almost to our screen 14 we walked past the screen 13 next door which was playing Devil. The doors were wide open and right as we walked by this horrible sound came out of there. FREAKED Brodey OUT.
"I DON'T WANT TO SEE THE MOVIE MOM!!!!" As tears are rolling down his face.
I'm like "Bro that's not the movie we are seeing. That's a movie for big people. It's not the same movie."
"I know, Mom, but I just want to leave now. Please. Please can we leave?"
I'm like well crap. How does this work? This has never happened to me before.
I find a girl that looks offical and I'm like "Okay so here's the deal. As we were walking to our theater, the theater next door to a kid's movie that is playing the DEVIL had it's doors wide open and the sounds coming out of there scared the crap out of my son. He is freaked out and doesn't want to stay to watch the movie. What do I do?"
"Oh I'm so sorry! That is no problem! Just go back to the box office and they will refund your tickets."
So we go back outside and stand in line again to refund our tickets. At this point Eric isn't back yet so Bro and I spent the next 25 minutes sitting outside of the movie theater eating movie popcorn and drinking a cherry Icee. The popcorn and Icee was pretty good. The people watching was even pretty good. The only problem is it was a little chilly but we survived.
So FYI to anyone that works at the movies theater...don't put scray movies next door to the kids movies. Oh and shut the doors for crap's sake! I don't even want to hear it!
Sometimes I wish my blog was anonymous so I could tell ALL of my funny stories. I would have you rolling about how I ate Cinnabon for the first time in years yesterday and how my stomach DID NOT like it and I had to stop at Target (where they were closing and trying to kick me out) and Reasor's where I was in the only stall with toilet paper. But I'll not tell you about THAT story! ;)
This weekend is my brother-in-law's birthday! It should be fun!
I think I'll be a good daughter tomorrow and help my mom paint. I kind of like to paint!
Well I'm off to pick up the house. It's amazing how quickly two boys can destroy a house that was clean yesterday.
Have a wonderful weekend!
LUV APRIL

Wednesday, September 22, 2010

Quotes and Songs

Quotes. I like quotes. They are sort of like songs.
I'm not sure that everyone connects with quotes. Or songs.
I connect with both.
If I'm sad I want to hear a sad song and it somehow makes me feel better. If I'm in a great mood I want to hear an upbeat song and it makes me even happier!
There are some emotions, though, that songs can't help. I don't really have any songs on my iPod for anger, for example. If I did it would probably make me even angrier and that wouldn't be good.
To get past anger I have to rely on quotes. They don't have to be from a genius. They just have to make you go "hhmm...ok."
There are quotes that I have from my Meme. Just little things she had to have repeated a thousand times. These quotes remind me to "act pretty" even when I don't want to and that "pretty is as pretty does."
They remind me that even though at times it doesn't seem like God is paying attention...he is. No matter how "ugly" other people are acting that it's still best to remember "do unto others as you would have them do unto you." Even when the offending party obviously doesn't have a Meme as wise as mine. ;)
They remind me that karma is a comforting thought. For me anyway.
"Retribution is tricky...the insult isn't usually worth the risk of punishment. And eventually one learns that karma has a surprising way of taking care of these situations. All you have to do is sit back and watch.
- Candace Bushnell (One Fifth Avenue)

They remind me to be patient because good always overcomes evil.
"Fairy tales are more than true; not because they tell us that dragons exist, but because they tell us that dragons can be beaten."
— G.K. Chesterton

I think that one is the one I will keep in my head as a fall asleep tonight. It has a good ring to it...don't you think?

LUV APRIL ;)

How To: Basic Heat Embossing Chipboard

Howdy folks! Since I shared how to heat emboss a stamped image last week I thought I would share another heat embossing how to this week!
Have you ever wanted glossy black title letters but didn't have any on hand? Or have you ever wanted pretty white chipboard letters but didn't want to run to the scrapbook store? Or have you ever wanted red glossy letters but you only have black? (Just yell YES!) Well I'm glad you want to know because I'm going to share with you how to use heat embossing to personalize your chipboard!


This layout was published in the June 2009 issue of Creating Keepsakes. It was actually in the Tips and Tricks column about covering chipboard. I did cover the chipboard flowers with patterned paper, but I also heat embossed the title letters in white. That's what I'll be showing you how to do today!


Supply List:

- Chipboard

- Embossing Powder
(I used THIS white embossing powder for this How To. You can use any powder you want to! I will be going over different powders in future posts!)

- Versamark or Embossing Ink
(I have tried many embossing inks and I like Versamark the best. It's tackier and dries slower but any embossing ink will work)

- Heat Tool
(any heat tool will work. I use THIS one from Hobby Lobby. Hair dryers will not usually work because they do not get hot enough and they blow air to hard.)

- Funnel Tray or Paper Plate
(this is what you will use to catch the embossing powder when you slide the excess off of your cardstock and pour it back into the container. You don't have to have either you can just use scrap paper.)

- Paper Piercer
(This is not a necessity unless you want burnt fingertips. LOL)


(To enlarge above photo just click on it)

Step 1
Take your chipboard and smush it into the embossing inkpad. You need to make sure the surface of the chipboard is thickly covered with the ink.

Step 2
Use your paper piercer and poke it into the side of the chipboard. This will keep you from burning your fingertips when you heat the chipboard and will also keep your surface smooth. (If you try to hold it or use tweezers your embossed surface will not be smooth)
While holding your chipboard over your funnel tray, pour your powder onto your chipboard.

Step 3
Dump off the excess powder. DO NOT TAP the chipboard.

Step 4
Begin heating the powder with your heat gun far away. Slowly bring the heat gun closer. (this will make sure you don't blow off all of the powder before it begins to melt)
Heat the powder until it begins to change. Do not overheat or you will burn the powder and it will be dull.
If you do happen to burn the powder, simply repeat the above steps to add a new layer over the burned layer.

Step 5
Allow the chipboard to cool! That's it!

You can stamp on top of the embossed layer with Stazon or another solvent ink. (I made a video about solvent inks HERE)
You can even add more than one color of powder! I made a video showing how to do that HERE!
The possibilities are endless!
If you have any questions please feel free to ask! Shoot me an email at massadmomma@yahoo.com!
Well have fun embossing some chipboard and have an awesome Wednesday!
LUV APRIL :)
Tuesday, September 21, 2010

Waiting...

That's what I did today. I waited. I waited on a Directv repairman that never came. He actually wasn't supposed to come but I didn't figure that out until after I had waited for four hours. Yes I know. The sweet little Mississippi boy with a southern accent did not specify that it was NEXT Tuesday between the hours of 8 and 12 that the repairman was supposed to come. At least the house is clean. I tend to clean when I wait. Don't ask me why.
For the last couple of weeks my satellite will go out randomly. Sometimes Brodey will be watching Kick Buttowski and all of a sudden we will be watching the US Open on ESPN. I'm not kidding.
I sat down for lunch the other day with my little ham sandwich to watch Real Housewives of DC and when I pressed play it immediately came up "would you like to delete this recording." OH NO YOU DIDN'T! Time to dial Directv.
I was lucky enough to get a person on the phone I could actually understand. It was kind of fun because the sweet boy that answered had a sweet southern accent with a twinge of girliness. It was fab. I totally knew he would sympathize with my screwed up recording of Real Housewives and at the time I needed some sympathy!
"Okay so this little problem has been going on for almost two weeks now. The straw that broke the camel's back was the fact that my Real Housewives of DC didn't get recorded."
He exclaims "OH NO!"
I said "Oh YES."
He says "Well my my we will have to fix THAT!"
I KNEW he would understand! He was very sweet and helpful except for when he told me the repairman would be here Tuesday but did not specify NEXT Tuesday. I even wrote it down on my calendar when he told me. But you know what? All is forgiven because my house is clean and I just enjoyed talking to him. Being nice will almost get you anywhere in life! Just like my Meme always said "You catch more flies with honey than you do with vinegar!" Think on that! ;)
I'm sorry I've been absent the last couple of days! I have been busy...no not waiting on repairman that never show up! I've been working on layouts and we got to see Eric's mom and sister this weekend. It was good.
Well I'm going to go veg on the couch and watch World of Jenks with Eric. It's a really good show. You should record it and watch it if your satellite is working properly. Don't worry I already made sure it recorded!
I hope your Tuesday has been fab and I'm sorry this post is photoless. That annoys me but I'm too lazy tonight to dig for one that is relevant. Waiting makes me tired. ;)
LUV APRIL

Saturday, September 18, 2010

Dessert: Pecan Pie Muffins


*Photo borrowed from the Pioneer Woman's Tasty Kitchen Blog portion of her website. Check it out! It's pretty awesome!
That's where I got this SUPER easy and SUPER tasty muffin recipe!
I love muffins! I especially love muffins this time of year! This is seriously one of the easiest recipes I have ever used! Sometimes the simple things are the best!
If you like pecan pie you will LOVE this! They are pretty rich so they are even better warmed up with some ice cream! Woo! So good!
I got this recipe off of the Pioneer Woman's blog. She has a section on there for cooking and she even has a separate website called Tasty Kitchen. The public can post recipes on there and the really good ones she highlights on her blog. She will even post step-by-step instructions with photos. It's perfect for beginning chefs or if you just want to try out a new recipe!
This is the very first recipe I have tried from the site and it was a hit! You can join the site for free and they don't even send you annoying emails! It's pretty awesome!
The step-by-step link is HERE and I'm posting the simple recipe below!
You have to try these out! You probably already have what you need in the pantry! I used finer chopped pecans than she did and they turned out great!
If you try them out let me know! ;)


Pecan Pie Muffins

You will need:
•1 cup Packed Light Brown Sugar
•½ cups All-purpose Flour
•1 cup Chopped Pecans
•⅔ cups Softened Butter
•2 whole Eggs Beaten

Preheat oven 350 F.

Grease your muffin pan (whatever size) or use the silicone cups.

In a medium bowl, stir together brown sugar, flour and pecans. In a separate bowl, beat the butter and eggs together until smooth. Stir into the dry ingredients just until combined. Spoon the batter into the prepared muffin cups. Cups should be about 2/3 full. Bake for 20 to 25 minutes. Cool on wire racks when done.

Option: when you take them out of the oven, place a slice of butter on top and eat warm. You may also use walnuts instead of pecans.


And that's all folks!
Hope you like 'em!
LUV APRIL :)

Friday, September 17, 2010

Welcome Baby Callie and Happy GAVEbirthday to Erin!!

Callie Tate Christenson
Born September 17, 2010 at 3:13pm
8lb 1oz and 20 inches


I am so happy right now! Life is beautiful!!! I can't help but wipe my eyes!
I just want to say welcome baby Callie! I'm sure you are beautiful! I can't wait to meet you and hold you! I couldn't be luckier to have your mommy as a bestie and you couldn't be luckier to have Erin as your mommy!
Erin, you will be the best mommy ever! You are one of the best people I know and have the most perfect personality to be a mommy! I'm sure Callie is a beautiful as you are!
I love you both!
April :)

I'm Not a Shoe Person


I'm not a shoe person. I'm just not. My Meme is. She has more shoes than any one person should have. Oh and so does my sister. I think she gets it from Meme.
I'm more like my mom in the shoe department. I hate having to put more than 30 seconds of thought into what shoes I'm going to wear with an outfit. That's one of the reasons I love summer! In the summer all I have to think about is what color of flip flops to put on. I love that. All of the other seasons are too much trouble. In Oklahoma it could go from 30 degrees to 70 degrees in a matter of minutes. I'm not exaggerating. It takes too much thought and effort to figure out what shoes to wear.
I shop the same way. I have to try EVERYTHING on before I buy it, but it usually only takes a split second for me to make a decision on whether or not I am going to purchase something. That's why Eric never complains when I ask him to take me by the mall or Old Navy. I can be in and out of the mall in less than an hour if I'm alone. I usually have a pretty long list too. Now that we don't live a few miles from a mall I have to get everything I need when I can!
So yesterday was a pretty big day for me. I found...wait for it...THREE pair of shoes! Winter shoes! I know I couldn't believe it either! I MIGHT buy two pair of shoes each season so this is a big deal for me!
So I put up my summer clothes and got out winter clothes the other day and I realized how shoe poor I actually am. I tend to only buy shoes that I feel like I will wear a lot. They have to be basic and stylish. Well that leads to me wearing them over and over all season and by the end of that season they look like crap. Usually.
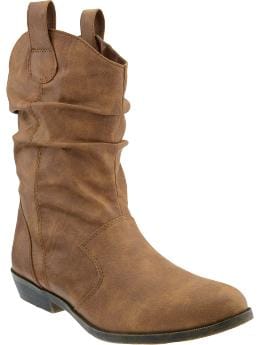
Yesterday I stopped in Old Navy and had to be in and out in less than 15 mintues. Yes I made the deadline, tried on clothes, AND bought for both me and Brodey. I told you I was fast. I bought a CUTE pair of short, flat cowboy boots and I love them. They are the ones in the photo at the top of this post. In fact I wore them last night to GNO(girls night out! Before I went, though, I left the house a little early and made a few pit stops at Ross and Rue 21.
A lot of people don't shop at those stores, but I love the treasure hunt. I LOVE me some Gap, but I am also an equal opputrtunity shopper. I have been known to wear things from Wal-Mart(they have super cute OU t-shirts right now) and I love TJ Max and Forever 21. If it's cute I'm going to buy it no matter where it's from. The great thing about that is most people won't shop where I'll shop! So most of the time I'm the only one that has it! Plus I think I dress cute! I won't wear it unless I love it! Hey Eric and I got Best Dressed in high school for goodness sake! ;)
Getting back on track. I didn't find any shoes at Rue 21 but I did find two pair at Ross! They are so cute! One pair are similar to some fake cowboy boots I have but they are black, distressed, and have some buckles on them. Fun! The other pair are short, flat, and can only be described as half Ugg crochet and half suede. Love them!
I am pretty excited about these shoes and I don't get excited about shoes! I (gasp) actually am excited for the cooler weather to set in so I can wear them! For someone who loves flip flops and summer as much as I do that's a big deal! Yeah for shoes!
I was hoping I would be able to title this post "Happy BIRTHday Callie!!!" but I'm not sure she's here yet! My bestie Erin went into labor this morning! Yippee! Wish I was there waiting on little Callie to make her big debut! Praying for an easy delivery and thinking about you Erin!!! Love you!! I have a surprise for Callie when I get to see her!
Tonight will be a fun night! I'm going out with some of the funnest girls in Muskogee! We will be celebrating my friend Kelly's birthday tonight in Tulsa! My mother-in-law will be headed up here later! Brodey is so excited! He loves his Mumu! I can't have Mumu coming to visit with a dirty house so I'm headed to clean!
I'm hoping to do another How-To soon but I'll have to see how this weekend goes!
I hope your's is wonderful!
LUV APRIL :)

Thursday, September 16, 2010

There and Back

Woo! I did some driving today! Four hours of driving! It was well worth it!
Not only did I get my hair did but I also got to see my parents! This is good even if it was only for about two hours! ;)
I left this morning for Shawnee right after I took Bro to school at 8. I headed back and pulled into his school just in time to pick him up! Just there and back. Kind of a bummer because I usually like to shop around a bit or sit down and eat with my parents! At least I got to see them though!
I never mind to drive. Eric is the one that has to fly to Dallas to avoid driving. I would drive us there and back if he would sit through it. I used to drive to OKC every weekend and back to Holdenville in the summer. Ever since I was 16. I have logged many hours driving my Aunt Karen through various states and am usually the designated night driver on trips with anyone. I prefer to drive at night. I can get anywhere with a paper map, but I can't promise I can get you back! ;) (backtracking is not my best skill)
I'm pretty sure the hours I have logged are why I have road rage. I say road rage but it isn't like I try to chase anyone down with a gun. I just get angry and frustrated when people can't drive. It isn't that difficult. Don't cut people off. Stay in the right lane if you aren't passing someone. Share the road with people who are yielding onto the highway. And cruise control is your friend. So are your blinkers. Can you tell I have many driving pet peeves?
I think it boils down to being courteous to other drivers and simply paying attention. People get in a hurry and don't think about anyone around them. That's why accidents happen. So pay attention and be courteous people out there on the road!!! (applause)
Okay I'm over it! :)
Brodey and Eric have to dine on leftovers tonight! Don't feel sorry for them! They have crockpot Italian chicken, noodle salad, mashed potatoes, and chocolate chip banana bread. Yes they are well fed! I want to share the chocolate chip banana bread recipe but that will have to wait until tomorrow! I have GNO (AKA Girls Night Out which was formerly Bunco) tonight! Wahoo! Can't wait! We always have fun!
Well I'm off to do what I would have done today if I hadn't been on I-40!
Have a wonderful Thursday! Tomorrow is Friday! Yeah!
LUV APRIL :)

P.S. No I didn't wear a swimsuit to get my hair done! Hehe! This photo is from this summer! Brodey is having so much fun in the back he needs to calm down! ;)

Wednesday, September 15, 2010

How To: Basic Heat Embossing a Stamped Image

Happy Wednesday to ya! ;)
Today I thought I would post a little How To! I started to video this, but I remembered I already did this How To back for the Just 4 Keeps forum! So I'm going to post it here!
If you have never tried to heat emboss now is the time! There are SO many different ways to do this! I will be sharing more ways to come, but today I'm just going to show you the basic way to emboss a stamped image.
This is the first layout I had published in Creating Keepsakes about embossing. It's from the November 2007 issue. I stamped the swirl design onto the leaves I punched from patterned paper and then I heat embossed them with black ink. Can you believe how little Brodey was! AW!!!

This is the second layout I had in Creating Keepsakes with heat embossing stamped images. It is from the December 2007 issue. I stamped and embossed the little ornaments with white powder, cut them out, adhered them, and drew the little "strings" with my black pen. I also stamped and embossed the title letters. Wow I was not having a good hair day!
Those are just two easy ways to add heat embossing to your layouts and we are just getting started! :) I have so many techniques to show you! But today we will start with the basics!


Supply List:

- Stamps
(the stamp I used in this sample is an Autumn Leaves acrylic stamp)

- Cardstock
(any cardstock will work, but different textures will give you different effects)

- Cornstarch or an Embossing Buddy
(this stuff is KEY to keeping stray embossing powder from sticking and making your image messy)

- Versamark or Embossing Ink
(I have tried many embossing inks and I like Versmark the best. It's tackier and dries slower but any embossing ink will work)

- Heat Tool
(any heat tool will work. I use THIS one from Hobby Lobby. Hair dryers will not usually work because they do not get hot enough and they blow air to hard.)

- Funnel Tray or Paper Plate
(this is what you will use to catch the embossing powder when you slide the excess off of your cardstock and pour it back into the container. You don't have to have either you can just use scrap paper.)

- Embossing Powder
(I used THIS white embossing powder for this How To. You can use any powder you want to! I will be going over different powders in future posts!)


*You can click on this photo to view it larger.

STEP 1:
Cover your cardstock with the cornstarch. Don't worry it will not alter your stamped image OR your embossing powder.

STEP 2:
Stamp your image with your embossing ink.

STEP 3:
Cover your stamped image in embossing powder. Hold it over your tray so you don't make a mess or waste embossing powder.

STEP 4:
Pour off the excess powder. Very gently tap your carstock with your finger to take off excess powder. Do not tap your cardstock too hard or the powder will come off of the stamped image.

STEP 5:
Heat your image by starting underneath the cardstock. This will begin to melt the powder, but will not blow it off. Now heat the image from the top until the powder changes.
All you have to look for is the powder to change. If you continue to heat it you will burn the image.
The only exception to this is if you are using Ultra Thick Embossing Enamel or UTEE. If you are using this you will look for the powder to change into water droplets, the droplets will melt into each other, and then you will stop heating. We will do more with UTEE in future posts.

STEP 6:
Once your image cools you can take a paintbrush or your finger and wipe off the remaining cornstarch. You must wait until it cools because the heated powder does not set until it cools.

STEP 7:
That's it! I simply punched my image out with a scalloped circle punch! You can do so many things with your embossed images!

REMEMBER practice practice PRACTICE! Practice makes perfect!
Never try a technique on a project! Always try it out first on a scrap piece of cardstock! :)

This is one of my favorite basic techniques to teach in class! Immediately students start going "OH! What if I did this? What if I did that!" It's an open door to creativity! I love it!
If you have ANY questions just post a comment! If you don't want to post a comment send me an email at massadmomma@yahoo.com!
If you try this technique out and use it on a project link me up in my comments! I would love to see your work!
I'm off to do laundry! Aw the joys of housework! At least I'm not pulling lawn furniture out of the pool like yesterday! ;)
Have a wonderful Wednesday!
LUV APRIL

Tuesday, September 14, 2010

Lawn Chairs in Flight

Brodey and I lucked out this morning. By the time we got to school the first wave of rain had made an appearance and it was just barely sprinkling.
We had the talk on the way to school about how it might be thundering and it would be loud, but he would be safe in the school. I told him he didn't have anything to worry about and if it was going to get bad I would be there to get him. I thought about turning around when I got home!
The clouds were looking pretty crazy and going this way and that way. I made it into the driveway when the wind started to pick up and on into the house when it started to get a little crazy.
If you don't know wind scares me just a little bit. You are probably thinking "well why do you live on a hill then...stupid." That would be a good questions! It is the very worst in February and March. So bad that shingles come off and I sleep with earplugs in. No lie.
So I made it into the house and I hear it start to get pretty windy. I mean windy as in the roof is creaking. I grab the phone and call my mom because I'm headed to the saferoom in the garage and I haven't even had time to turn the tv on to check the weather. When I open the door to the garage it slams against the wall and I'm thinking I forgot to close the garage door. Nope. It was just that strong. I go out there and it's blowing so hard that my garage doors sound like they are vibrating. I'm thinking oh man I hope Brodey isn't freaking.
My mom tells me no tornadoes they just said strong straightline winds. If you don't live in Oklahoma straightline winds are kind of like horizontal tornadoes. They can blow your roof off.
So eventually the wind dies down and I head back in the house. I look out the windows and notice all the plants are blown over. Then I notice the hummingbird feeders are blown down. Then I'm like oh crap. All the lounge chairs are in the pool and the large patio furniture is missing. I go to the edge of the back porch and there it is. One of the large chairs are against the fence and the large loveseat is in the pasture. Nice. Good thing I didn't see THAT fly through the air! I took the pics with my phone and you can see the loveseat is the little speck to the left of the pine tree and the chair is chillin' on the fence.
I call Eric and instead of wow that scary I'm glad you are alive (Hehe) he's like "Well you are just going to have to get into the pool and get them out!!! They are going to rip my liner! And if you leave that chair out there that fence will tear it up!"
"Gee Eric...no it's not pouring down rain. No there isn't cloud to ground lightening!! Are you serious!?! What's wrong with you?"
"Oh I didn't know it was still storming."
"Well look out the window! You are only like 15 miles from me!"
Nice to know he cares! ;)
Eventually I did go out and fish the chairs out of the pool. No I didn't get in. I pulled them out with the pool brush. I have no idea if the liner is ripped. I also went out and got the chair but I didn't venture out into the pasture yet. That will have to wait because it's pouring again and there is the occasional rumble of thunder. I did help a baby snake back into the pasture where he belongs.
I feel bad, though, because I sent my kid to school in shorts and a t-shirt and it's 64 degrees outside. I hope it warms up because I have nowhere to put a mother of the year trophy.
What a morning. At least I got to see my (imagined) best friend Tim Holtz on HSN this morning. That's us in that pic last year in Houston. I'm not sure I ever blogged that story. (Hush it Jen and Trish) It's pretty funny so I'll do that one day. He's the coolest of the cool. The storm actually knocked out the satellite for a while so I'm going to finish watching at 3 this afternoon...hopefully. It's going to storm again and I really hope it passes through before then! I hope the loveseat doesn't get blown further out. Geez.
Speaking of HSN did you know that it's my lifelong dream to be a hostess there or on QVC? I have always thought that would be the coolest job EVER! Just thinking about it gives me chills! I'm weird I know! Ha! I would love to be on there with the Quacker Factory lady! I would ROCK one of her headbands! ;)
Well the thunder is getting close so I should post this before I lose internet and satellite again.
Have a fantastic Tuesday!!
LUV APRIL :)

Monday, September 13, 2010

Dinnertime: Chicken and Mushrooms

Happy Monday to ya! ;)
Chicken and Mushrooms is one of the very first dinners I started cooking and I still cook it. I cooked it last night for dinner!
In my house we LOVE mushrooms. I buy mushrooms just about every time I go to the grocery store. I can put them in many of the dishes I cook. I also slice them and put them in our salads so I usually have them on hand.
You don't have to put mushrooms in this dish if you dislike them. You can just put the onions and peppers in for flavor! I have made this when I only had onions and it turned out great! I used a red and yellow pepper in the one I photographed!
I usually pair this with mashed potatoes, Mac and Cheese(cause that's what my boys like), and some sort of vegetable like corn or squash.
This is a yummy dinner that you can add or take away whatever you want to make it your own! I have been cooking it for over 10 years and I'll be cooking it for many more to come! :)
I hope you love it too!
LUV APRIL

Chicken and Mushrooms


6 Boneless Skinless Chicken Breast Tenderloins(Thawed)
1 Green Bell Pepper
1 Package of Mushrooms
1 Onion
⅓ Cup Worchestshire Sauce
⅓ Cup Soy Sauce
⅓ Cup Water
Salt to taste
Pepper to taste
Garlic Seasonings to taste

Preheat the oven to 400 degress.

Put your thawed chicken breasts into a 9x13 inch pan. Pour in the sauces and water. Cut and wash your mushrooms and put them in the pan. Cut up the onions and pepper into larger pieces and put them in the pan.

Sprinkle the garlic seasoning, pepper, and salt over the chicken and vegatables. Be very light with the salt as the soy sauce will compensate.

If there isn’t enough juice in the pan, just add equal amounts of the sauces and water until it goes about halfway up the chicken tenderloins. During cooking, some of the juice will be soaked up by the chicken. If the juice runs too low during cooking, just add some more!

Cook chicken for about 20 minutes. Turn the chicken over and return to oven. It will take the chicken about 35-45 minutes to cook, depending on thickness. Check for doneness often during the last 10-15 minutes so the chicken doesn’t dry out.

Remove chicken and vegatables to platter and serve!

Sunday, September 12, 2010

I Heart Cookbooks


What a great weekend! No plans and nowhere to drive. It was good and it went way too quickly.
We just piddled around the house this weekend and we went to Tulsa late yesterday. Eric wanted to look at trucks and I wanted to run into Barnes and Noble. I was on a mission to get two cookbooks.
Ever since the Real Housewives of New Jersey episode where Teresa is canning the tomatos I wanted her cookbook. It's called Skinny Italian and it's SO good! There are a ton of recipes in there that I am dying to try! Plus it has lots of personal stories that are pretty funny!
The other cookbook I wanted was the new Trisha Yearwood one Home Cooking With Trisha Yearwood. I LOVED her first one, Georgia Cooking in an Oklahoma Kitchen, so much that as soon as I saw she had another one out I HAD to get it! It has some super yummy recipes in it as well and I can't wait to read through it tomorrow when I am all alone! ;) As a matter of fact the peach cobbler I made tonight for dessert is from her first cookbook. It's really hard to find a cookbook with good, basic recipes in it. I hate cookbooks that try to get all fancy and add crazy ingredients to regular dishes.
I have a ton of cookbooks and there are only a very small handful that I actually use. Another of my favorites is The Pioneer Woman Cooks. If you blog (are from Oklahoma or watch TV) you know who Ree Drummond AKA The Pioneer Woman is. If not you are truly missing out. She writes my all time favorite blog and is the funniest person ever. (Well of course she is! She's from Oklahoma! Haha!) She has a section on her blog of recipes and they are SO good! If you have never visited her site you have to NOW!
I love cookbooks because I cook every night that we are home. It's much quicker than driving into town and we have started to think what I cook is better than just about anywhere we can eat out. In our area the restaurants are limited. We do have a great pizza place in Tahlequah, but just about the only place we will eat in Muskogee is Rib Crib. So obviously I cook quite a bit!
To spice things up I've kind of made a little challenge for myself to try a new recipe at least every other week. You have to know that Eric is pretty picky so it's tricky for me to try new things. Brodey's motto is "you don't know you like it 'til you try it" so he's much more fun to cook for. He will try just about anything! Last night he was eating sushi with the little chopsticks the waitress put together with rubberbands! LOL
Tonight for dinner we had chicken and mushrooms. It's one of the first meals I ever started cooking. It's so easy and quick. I'm going to post that recipe either tonight or in the morning if you want to try it out yourself! I'll also post the peach cobbler recipe from Trisha Yearwood's cookbook soon! It's super yummy!
Well I hope you had a wonderful weekend!
Ready or not here comes Monday!
LUV APRIL :)
Oh P.S. The layout above is a layout I did about my Granny's mixing bowls. It was in the May/June 2010 issue of Creating Keepsakes! If you click on it you can view it larger!

Friday, September 10, 2010

How-To: Journaling Strips


This is how I do journaling strips for my layouts. I'm sure everyone has their own way to do it, but I'm going to try to make it simple for you. If you have ever wanted to try them now is the time!
They are super easy. I posted about fonts and my Font Folder HERE. I use Wicrosoft Word to create my journaling. You can use any program where you can create text boxes in specific sizes. Some people use Photoshop, but it's easiest for me in MS Word.
You will need a printer to print your journaling. I use an Epson R1800 that I have had for four years now. It is a larger printer and will print on 12x12 but you don't have to have a large printer. You can just trim down your 12x12 paper to fit into your printer.
You will also need a ruler to measure and carstock to print your journling on. I keep scraps of cardstock to print my journaling onto. I just keep it in a drawer in my scrap room and pull out the size I need to print.
Journaling is the very last thing I do on my layout. Larger elements are more difficult to change last minute, but journaling can go just about anywhere.

1. First you need to measure the area where the first part of your journaling strips will go. You need to measure both the width and the height. I measure about 1/4 of an inch less because I don't want my strips to overlap any elements on my layout. Write your measurement down.
(If you click on the photos you can view them larger)

2. Now measure the second area where the last part of your journaling will be. (If you only have one area for journaling just skip this step.)
Measure both width and height and write it down just like in step 1.


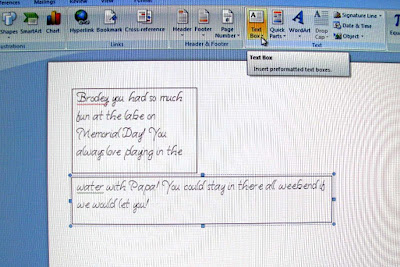
3. (I know this pic isn't the greatest but I don't know how to do a screenshot LOL Oh and this isn't the journaling for this layout. I made this journaling up)
In MS Word open a new document and create two text boxes. Set both to the sizes of the areas you measured. You do this by going to FORMAT TEXT BOX > Click on the SIZE tab.

4. Type your journaling in the boxes and change the font/size to fit both boxes. Get rid of the black line around the boxes by going to FORMAT TEXT BOX > COLORS AND LINES > NO COLOR.

5. Change the amount of space between the lines of text so that you will have room to trim them into strips once you print them. You can do this by going to PARAGRAPH > SPACING > 1.5 LINES.

6. Print out your journaling and trim the lines into strips.


7. Arrange them onto your page and adhere them! That's it!

Now go try it on a layout! If you do be sure to comment and let me know! Also if you post to an online gallery link me up!
I hope this helped you if have never tried it before. Or maybe you did it a different way and you like this way better! If you have any tips yourself be sure and comment!
If you have any techniques you would like to learn leave me a comment and I'll do what I can to post a how-to or video!
Well I'm off to clean up dinner mess! I have been working on this post since oh about noon!
Have a great weekend! I'll be spending mine with my boys!
LUV APRIL :)

A Good Laugh

(This pic is from 2008 and I still think it's hilarious.)
So I'm browsing the aisles of WalMart this morning while checking my email and I had to bust out laughing! Apparently I'm not the only one who has had a bad Supercuts experience. ;)
When I post on my blog it automatically feeds to my Facebook through Networked Blogs and for some reason it puts my post into a Note. Sometimes people will comment on my blog posts on Facebook but oh my gosh I was cracking up when I read the comments from last night's post. After reading those comments I promise to never take my poor child to Supercuts ever again. I'm sorry if you happen to work at Supercuts and if you do you should find another salon. People apparently don't like Supercuts.
I actually drive two hours to get my own hair cut. The same man has been cutting my hair since I was 10. That's a long time and I have never cheated. I walk in and sit down and he does his thing. I love him. So I guess it's pretty bad I take my kid to Supercuts.
Anyone who lives in my area know of a good barber shop? I really wish I could do it myself. That has never turned out well in the past. Eric and I tried once and it was hilarious. You can read about it HERE. I wish my internet was good enough that I could post the video on YouTube of that haircut incident. He looked ridiculous and went running around the yard and wouldn't let Eric finish. Good times. I would just buzz it off like we did then, but I don't think Bro looks so great with a buzz cut. Nothing against buzz cuts...it's just not for him. So I'm on the lookout for a new hair place! :)
I just got in the new tie shirts I ordered for Bro. He is just about to outgrow his and I just couldn't imagine life without a tie shirt. I got him a super cute brown one and a long sleeved one with a red tie. I'm going to use it for the Christmas pics I will take and never send out. ;) Every time he wears the tie shirt people ask me where I got it. The last time Brodey wore his to school he said everyone liked it...and I mean everyone. The Etsy store I get them at is called Super Sweet Creations and I have linked it over on the side tab of my blog under My Favorite Shops. She uses good quality materials and her shipping is quick.
I finished the Journaling Strip How To but I'm going to post it in another post so it's easier to find if you are searching it.
Well I'm off to put my clean sheets on the bed. Uh I LOVE me some clean sheets!!! It's the best!
We will be staying around here this weekend. We have to go to Tulsa and who knows what else we will do. It will be nice to not have to pack up and go anywhere!
Have a safe and wonderful weekend!!
LUV APRIL :)

Thursday, September 09, 2010

Supercuts Drama


Well I didn't get the journaling strip how-to done. I didn't get to go to the grocery store. I didn't get to cook dinner either. All because I had to take Bro to get a haircut.
It's been a long time coming. He has been a little mushroom head for about a week now. He really hates getting his hair cut. He used to love it because I would take him to Snip Its in OKC and those girls would whip that haircut out in under a minute! There is no Snip Its in Tahlequah OR Muskogee so I would take him to Supercuts and hope that the girl did a good job. Not today.
He didn't want to get a haircut but I had talked him into it and he just walked right in and got up in the chair. I thought okay this is going to be fine.
I always put a little gel in the front of his hair and spike it up. (I know it's time for a haircut when he starts to do the wave in front like Brandon Walsh from 90210) Well this morning it was pretty unruly so I had to gel it a little around the back. Well the haircut lady didn't even comb it out before she started in with the clippers. She goes up the back of his head and the clippers grab a clump of gel. His eyes got big and he just went "ouch."
I'm like "well we just came from school so we didn't have time to comb it out or wet it down...." HINT HINT
She didn't take the hint and goes for it again with the clippers. They grab another clump and he screams. I can tell he is getting pretty ticked off and he gives me the "I'm almost done with this crap" look.
I'm telling him "it's okay you will be fine" and third time's a charm. Her clippers grab another clump of hair and all hell breaks loose. I seriously had flashbacks from the shots at the health department (can't remember if I blogged about that one and if not I HAVE to).
He is screaming "I'm NOT DOING THIS ANYMORE" as he is literally ripping off the cape (which was an ADULT sized cape anyway). He jumps out of the chair and runs for the front door.
I'm trying to remain calm while I am thinking we can't leave with a 1/3 chilly bowl haircut and I wonder how she would react if I grabbed her icky ponytail and yanked it! She is actually acting surprised and not once does she apologize.
I finally pry him away from the front door and get him back over to the chair. I'm like "Okay I'm pretty sure at this point we need to comb it out...DON'T you think?"
So I get it combed out and realize I'm going to just have to sit and hold him while she finishes.
It was NOT fun. I have no idea how you guys do it. I had hair EVERYWHERE. I had hair in my bra. I had hair all over my face. I had hair stuck to the insides of my elbows. I'm not usually a spaz (no really I'm not!) but that hair had me on the edge of a mental breakdown. It was everywhere. My antibacterial wipes couldn't even get it off! We finally left with a haircut that Eric had to fix when he got home and I'm sure they were happy to see us go.
I had promised Bro we would trade in some games and pick out a new one at GameStop and I had to look funny in there waiting on him to pick one out. I wanted to get down on the carpeted floor and roll around like a dog that has found something dead. I had red splotches all over me and needless to say there was no way I was going to go to WalMart in that state. It was bad.
So no WalMart meant no cooked dinner because I cleaned out the pantry with last night's. The boys were more than happy to eat leftover spaghetti and I got to eat cereal for dinner! I was pretty excited!
Uh just typing about hair makes me get all itchy. Uh.
Well I'm off to bed. No storms tonight thank goodness and I'm hair free.
I can't believe it's already Friday! Wow!
Well have a good night!
LUV APRIL :)

Tuesday, September 07, 2010

Oh My Fonts


Fonts are awesome. I love them. I probably have hundreds of them. I use them every time I do a scrapbook layout or pretty much any project. My handwriting is okay, but I can type and print journaling much quicker than I can write it.
I use Microsoft Word to print almost everything I do. Journaling is usually the very last thing I do on a layout. Printing and adding journaling strips to my layouts is super fast and easy. If you have always wanted to try it you should! I'm thinking about doing a how-to for journaling strips. I might do that tomorrow!
Today, though, I'm sharing how I made my super easy and super helpful Font Folder! I hope this helps someone out there who loves fonts as much as I do!
I used to just scroll through the font list in Word until I found the one I wanted to use, but when my list started to grow I realized I needed a better way to find the font that best fit my project. I came up with the perfect solution!

I went into Microsoft Word and I simply typed out the font's name in the font plus Brodey's name at the end. (adding his name just gives me more of a sample of the font plus his name is on almost every layout I do anyway)

I type everything out in 28 point unless it's difficult to read and I change it to 36 point. It has to be large enough for me to quickly scan over to find the font I want.

I then printed it out and put it in a presentation folder.

When I need to find a font I just flip through until I find the one I want to use! I don't bother to put them in alphabetical order because when I am searching for a font I am simply looking for a style I want to use.

Every time I download new fonts I just go back to my document, type the new fonts out, and add them to my binder. Once I have printed my new fonts I put the date at the bottom so that I know when I last added the new fonts. (This is just in case you forget to print out new fonts you have downloaded)


It's that simple! I use my font folder every time I use my fonts for a project. It saves so much time! You can do the same thing if you use dingbats!
The fonts I use most often are my Creating Keepsakes fonts. They are the ones with the CK in front. I used to get them all at Scrap N Fonts but they no longer sell the CK fonts. You can actually download the CK fonts for free if you are a Club CK member. When you pay for a subscription to CK Scrapbooking Tips and Tricks Magazine you become a Club member and you can go onto the website and download the fonts for free. That is an awesome magazine, not only because I contribute hehe, but because it is filled to the brim with awesome ideas for pages and tips to make your scrapping life easier.
I still purchase most of my fonts from Scrap N Fonts. They are actually having a $1 sale right now. They have great fonts plus lots of other fun digital goodies!
Well I hope I made your font life a little easier! ;) If you have any questions about my Font Folder just leave me a comment!
Check back in tomorrow for the journaling strips how-to!
Have a wonderful Wednesday!
LUV APRIL

Friday, September 03, 2010

A Little Chilly

Woo it's a little chilly on this Friday in Oklahoma! Feels (and smells) like football weather! I love change, but I highly dislike winter so I'm a little torn. I think I summed it up in this post from last year. So I'm sorry fall, but I hate what comes after you! ;)
I wonder when the hummingbirds will decide to head south. I have to have at least 30 to 40 buzzing around my back porch. Eric didn't believe my when I tried to explain how many we had a few weeks ago. I have four feeders that I have to fill up every day. No joke. I keep an empty gallon milk carton full of nectar for them. It's insane how many we have. Eric didn't believe me until he saw it for himself. I wish there was a way to capture them all on video. I'm sure I'm not the only one with tons, but it's just so cool! I think they love all of the flowers I have back there. Their faves are the petunias and the hibiscus...if the vegetarian raccoons will leave them alone. ;)
I'll probably leave at least one or two feeders up all winter. I read this summer that there are sometimes poor little stragglers that are late in heading south. A feeder left out is the only way they will survive the journey! :( So sad and mine will definitely be left out!
Brodey is excited for the weekend. He didn't have school today. We are headed to the lake probably tomorrow. I'll be curious to see how heading back to school on Tuesday morning goes. Hopefully he is happy to go. Mrs Tuck told me yesterday that Brodey asked her "could he just spend the night because he LOVES school!" LOL Oh I'm sure she would love that! ;)
Well I'm going to finish up laundry!
Have a wonderful and safe holiday weekend!!
LUV APRIL